
Instant Kitura with SwiftXcode
 Creating
Kitura
endpoints using the tools provided by IBM (the app
or
Creating
Kitura
endpoints using the tools provided by IBM (the app
or kitura init) is quite inconvenient.
Using
SwiftXcode
you can do the same straight from Xcode,
w/o touching the shell during development.
We’ll show you how!
Update 2019-06-25: Xcode 11 now includes some Swift Package Manager support which obsoletes some parts of this. It lacks some features of SwiftXcode (like the Kitura project templates), but those could be added separately.
When you are starting with Swift on Server, we generally recommend you either use SwiftNIO directly, or a lightweight shim such as MicroExpress. However, if you really want to use a more complex framework or need proper professional support, we tend to suggest the Kitura framework by IBM.
An annoyance with Kitura is the development flow involving
kitura init in combination with the dreaded
swift package generate-xcodeproj.
To fix that
SwiftXcode was created to support
Swift Package Manager
projects directly from within Xcode. And hence: Kitura.
Installing SwiftXcode & The Kitura Image
 Presumably you have installed it already, but if not,
grab Homebrew - a package manager for macOS.
Using Homebrew, install the
SwiftXcode Kitura Image:
Presumably you have installed it already, but if not,
grab Homebrew - a package manager for macOS.
Using Homebrew, install the
SwiftXcode Kitura Image:
brew install swiftxcode/swiftxcode/swift-xcode-kitura
swift xcode link-templates
What this does is:
- It installs SwiftXcode, which is a set of shell scripts and Xcode templates to integrate Swift Package Manager into Xcode.
- It builds and installs the SwiftXcode Kitura Image.
swift xcode link-templatesensures the image Xcode templates are made available to Xcode.
What is the “Kitura Image”? It is two things:
- A set of Kitura specific Xcode project and file templates.
If you create a new project
within Xcode
(⌘-Shift-N) , you’ll get the “macOS / Server / Kitura Endpoint” project. And if you create a new file (⌘-n), you’ll get the “Server / Kitura Route” file template. We’ll show you below. - It fetches and precompiles Kitura and its dependencies, just once. Without an image, every new Kitura projects needs to fetch and compile all the required dependencies, again and again. The Kitura Image does this once, so when you create a new Kitura Xcode project, all the Kitura framework stuff is readily available and only your own code needs to get compiled.
It is not only integrated into Xcode, it is also much faster to get going because all the dependencies are fetched and compiled just once.
But let’s see how that works. Now that you have the SwiftXcode Kitura Image installed:
Building an ASCII Cow Endpoint
As usual we are going to build a Kitura application that is going to serve a splendid set of ASCII cows:
         (__)
         ====
  /-------\/
 / |     ||
*  ||-||-||
   ^^ ^^ ^^

This cow is from Mars
Also a good chance to point out our excellent cows applications, available for free on the appstore: CodeCows (macOS) and ASCII Cows (iOS).
Creating the project
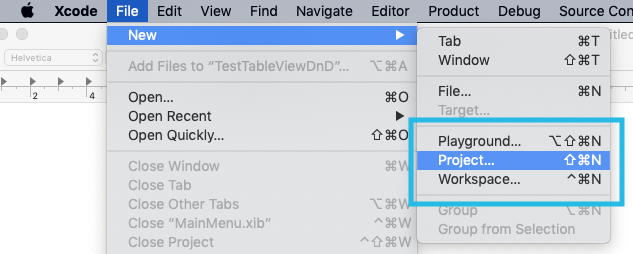
Within Xcode, create a new project, ⌘-Shift-N or use the menu:
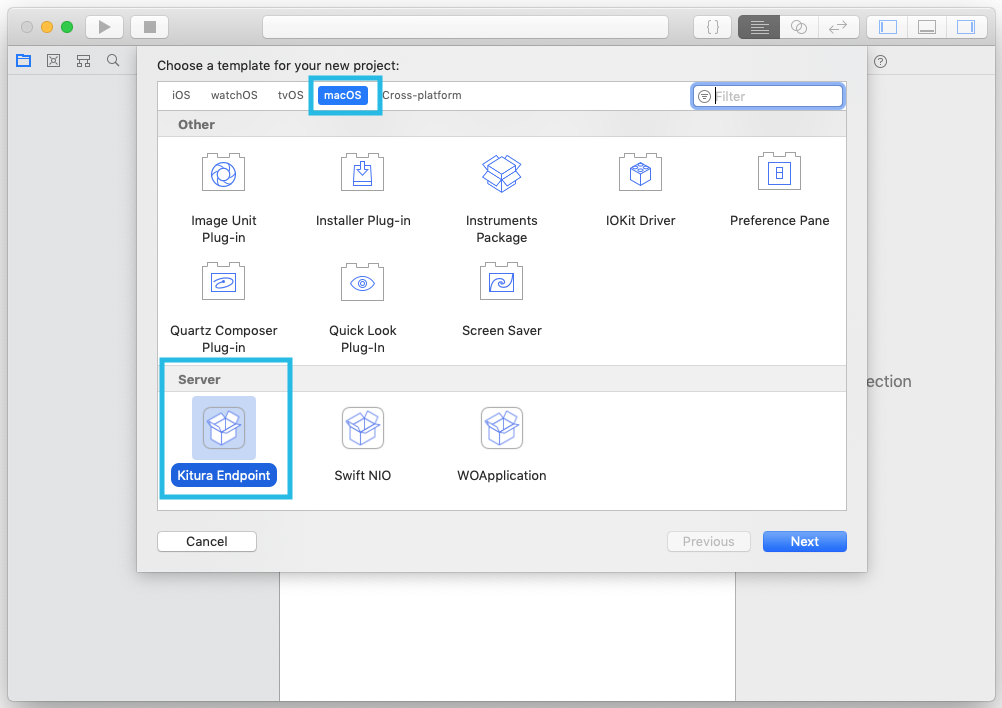
Select the macOS tab and scroll down to the new “Server” section (this one is also showing the Swift NIO and SwiftObjects images), select the “Kitura Endpoint” template.
Pro-tip: You can also start typing “Kit” to quickly filter the available templates down to the important stuff):
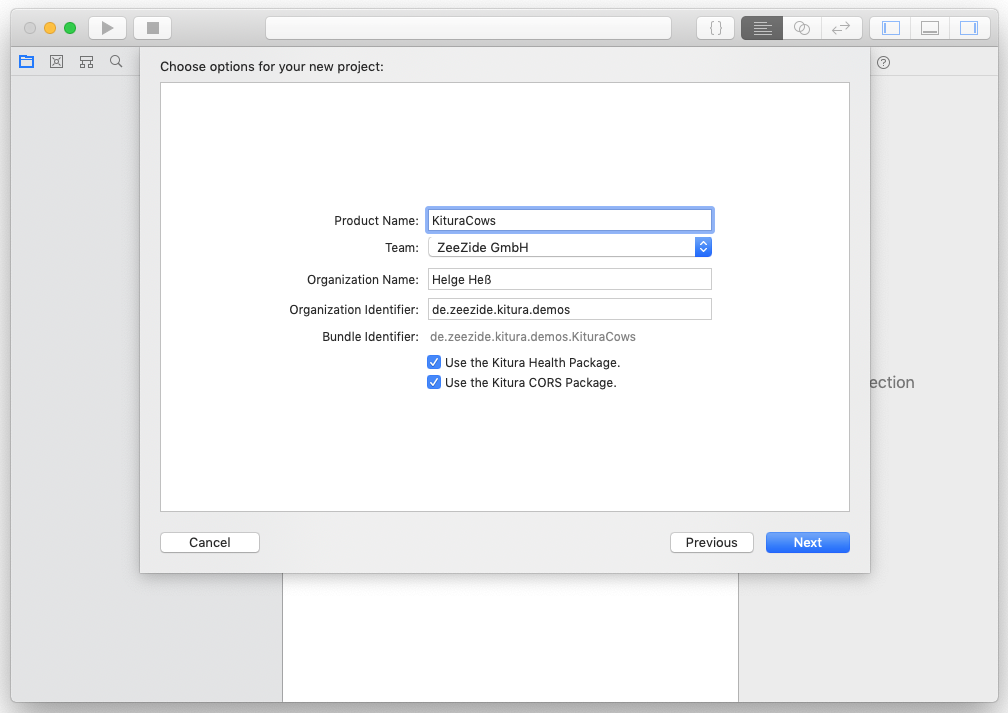
You’ll get to a wizard showing the Kitura template options,
just give the product a name, like KituraCows, and continue:
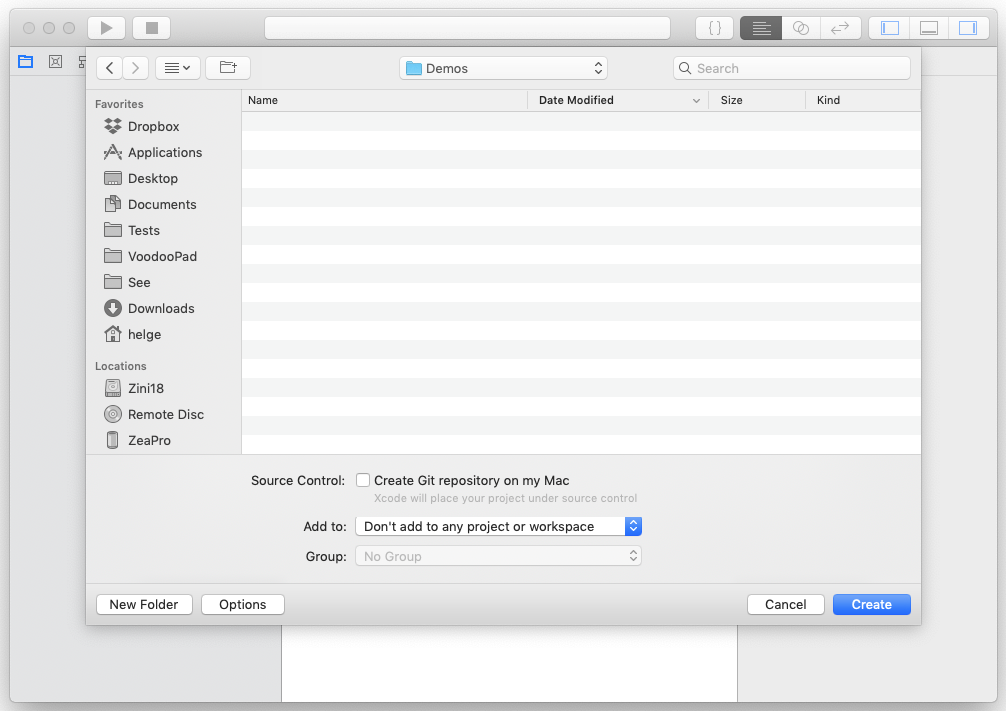
Choose some arbitrary place where you want to store the project:
And Xcode will create you a new project with all the basic Kitura boilerplate:
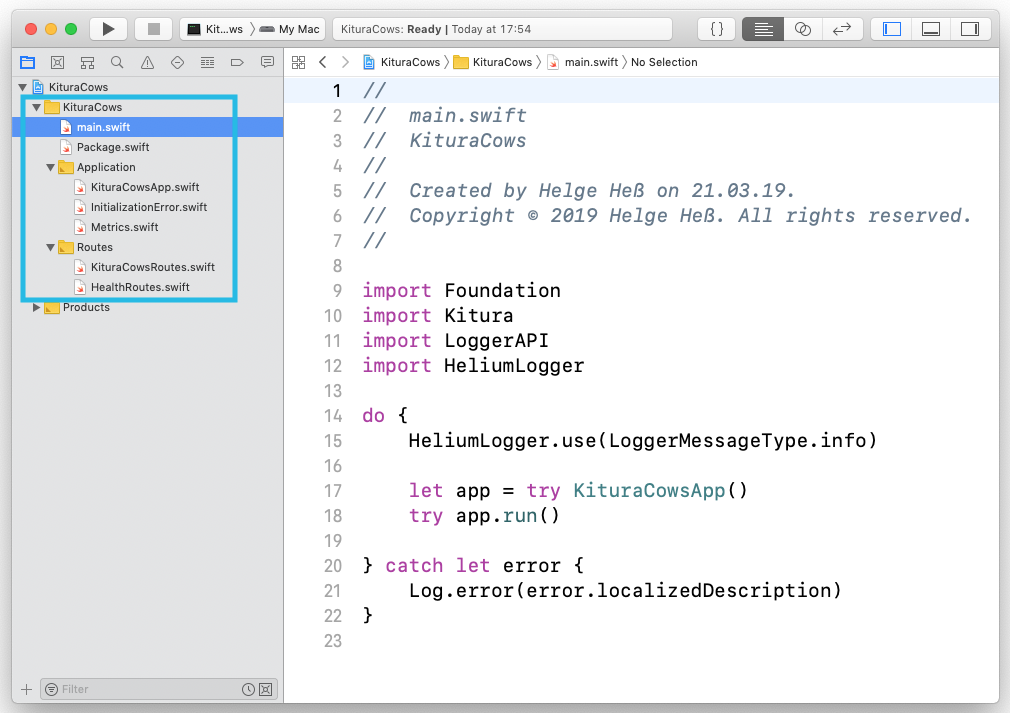
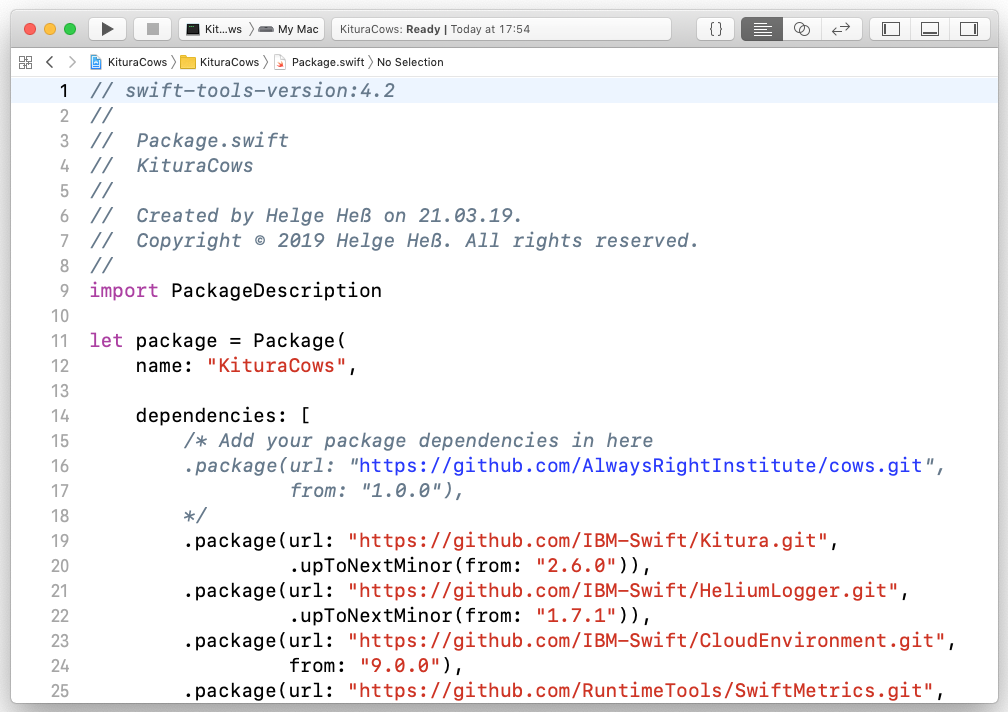
Pretty much what kitura init does. The Package.swift looks as usual:
And so do the other files created by the project template.
Running the project
Now just press the “Run” button in Xcode. This will compile the sources in the project and run the application. Notice how it doesn’t have to fetch or compile Kitura and its dependencies, those are already contained in the Kitura image and will be unpacked as part of the process. So all that is a matter of seconds:
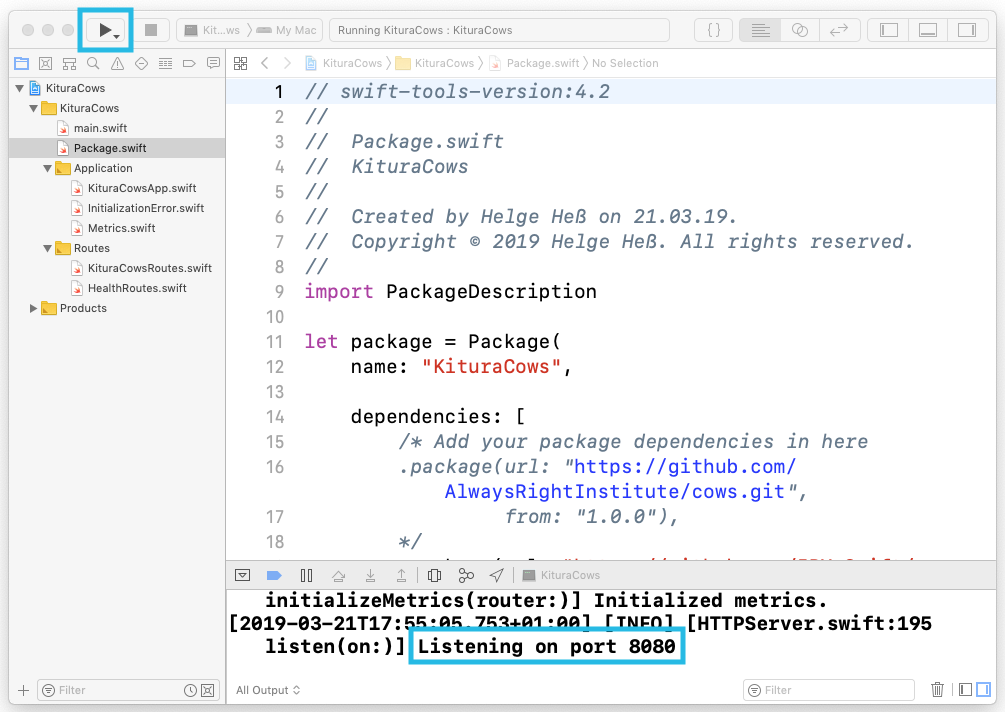
Kitura is running on port 8080 (if you need a different port, e.g. the
macOS Apache might be running on 8080,
just set the PORT environment variable in the Xcode scheme).
You can now access the default setup using
http://localhost:8080/:
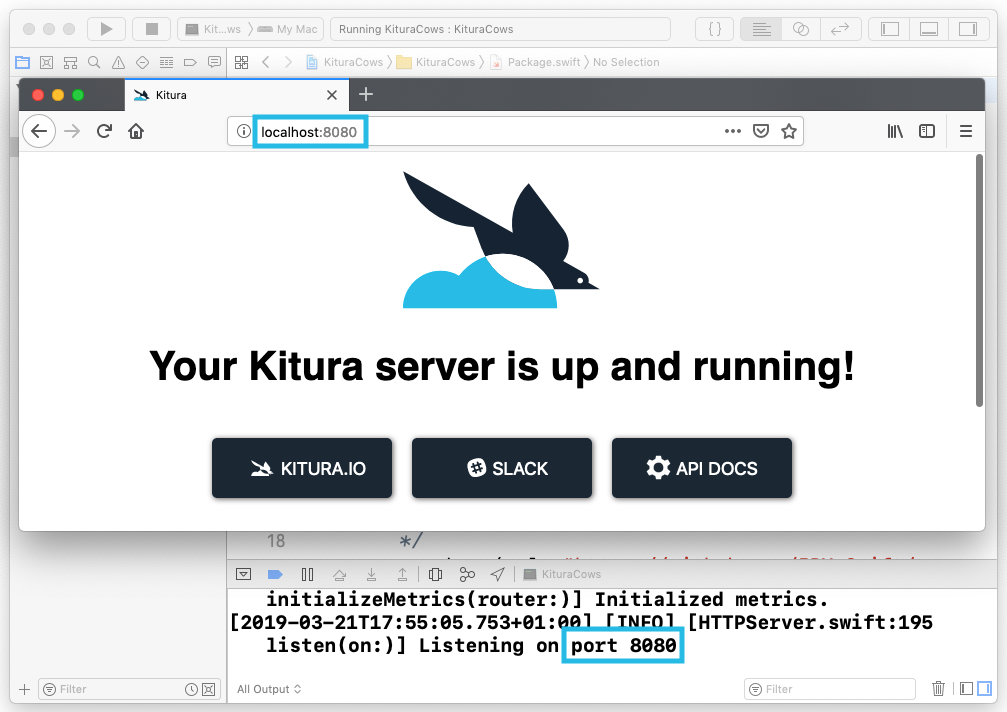
Very well. Seconds from project creation to a running Kitura, all within Xcode.
Making a Cows Endpoint
But we don’t want the Kitura default page, we want proper ASCII beef!
To get there, we need to edit the Package.swift file and
import the cows package:
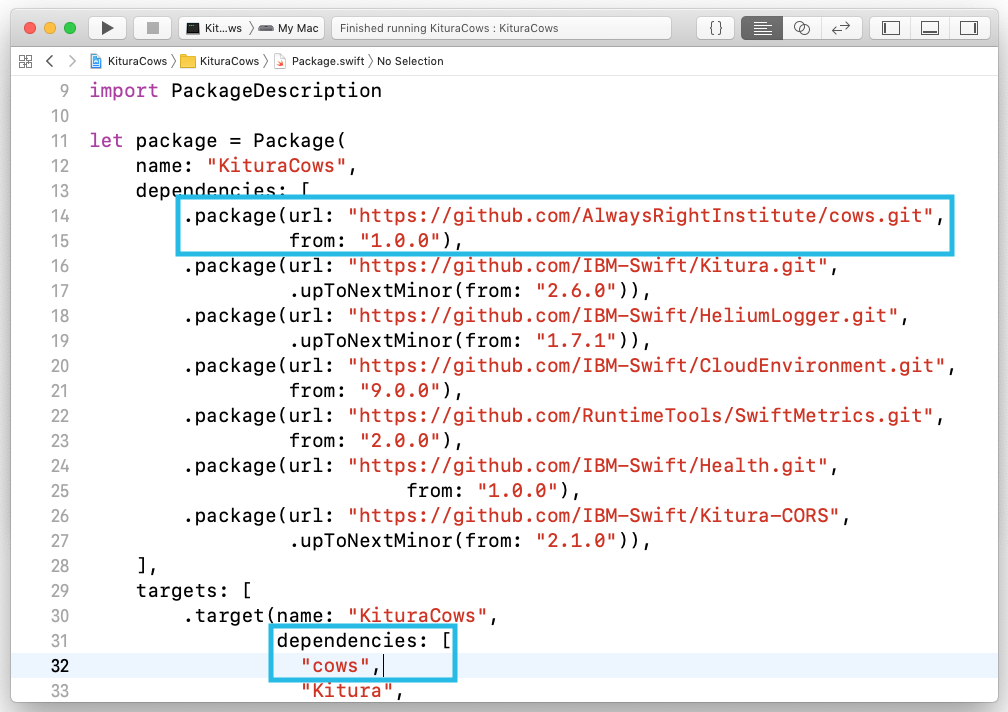
Don’t forget that SPM insist that you repeat yourself and add the cows
module as a target dependency as well!
Adding a “cows” Route
We could just add the necessary code to the existing files,
but let’s go the “Create Kitura Route”, well, route. For demonstration
purposes.
Select the “Routes” group in Xcode and press ⌘-n or do it using the menu:
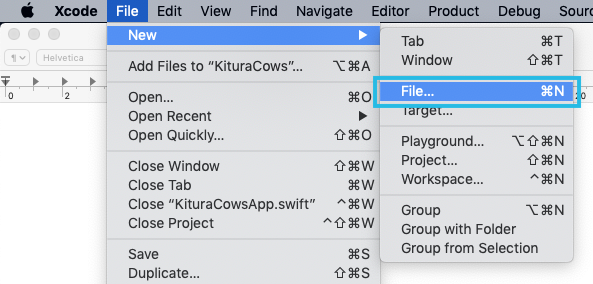
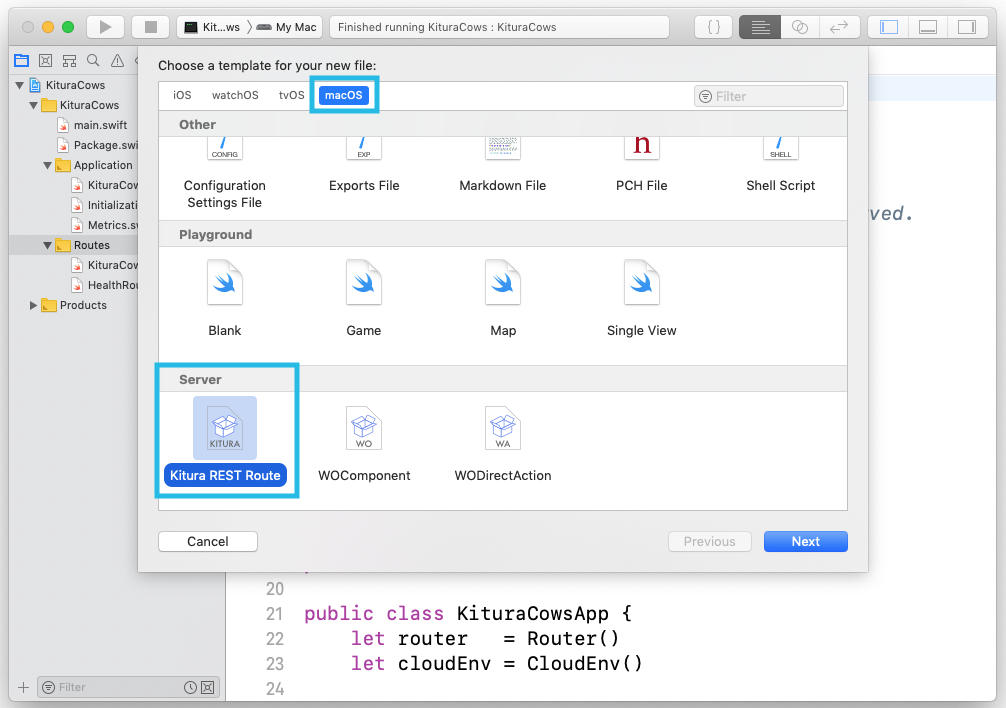
Again, locate the “Server” section in the “macOS” tab and chose the “Kitura REST Route” option:
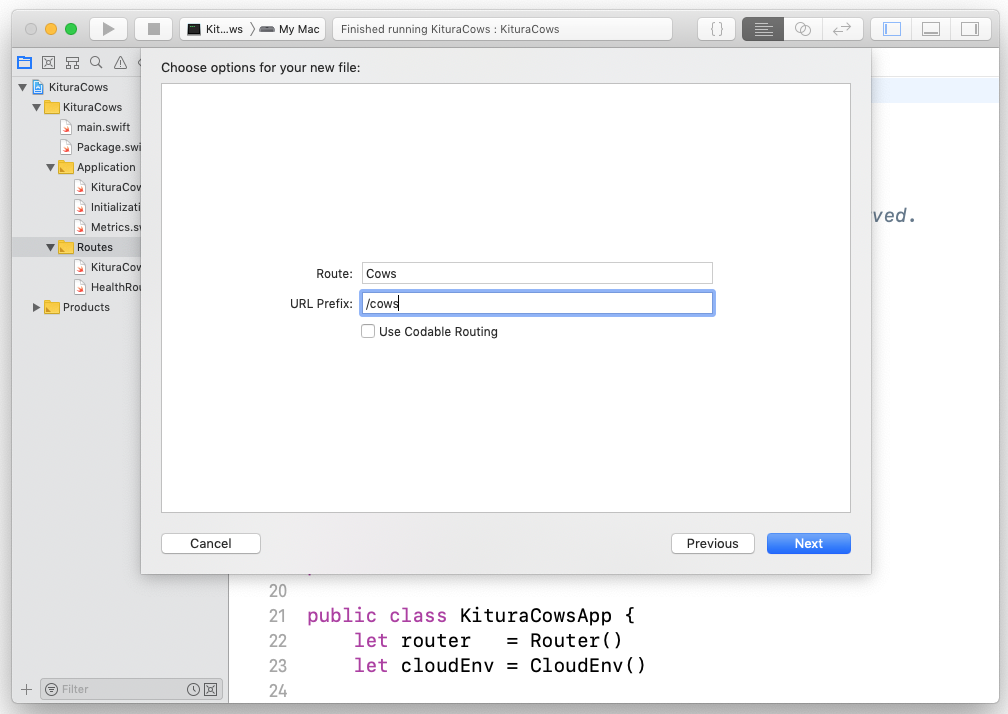
This will popup the wizard for that template, give the Route a name “Cows”
and a URL prefix /cows. We don’t need Codable routing here:
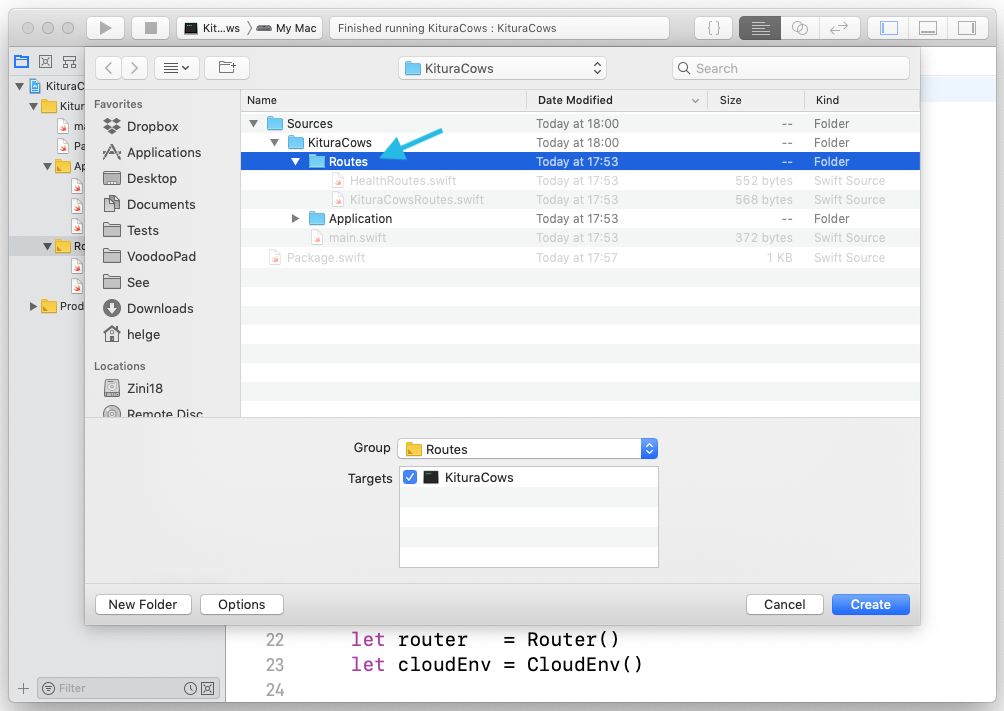
Finally select where the file should go. It doesn’t really matter, but put it into the Routes folder created by the project template:
Xcode creates a new file with all the routing typical for a REST endpoint:
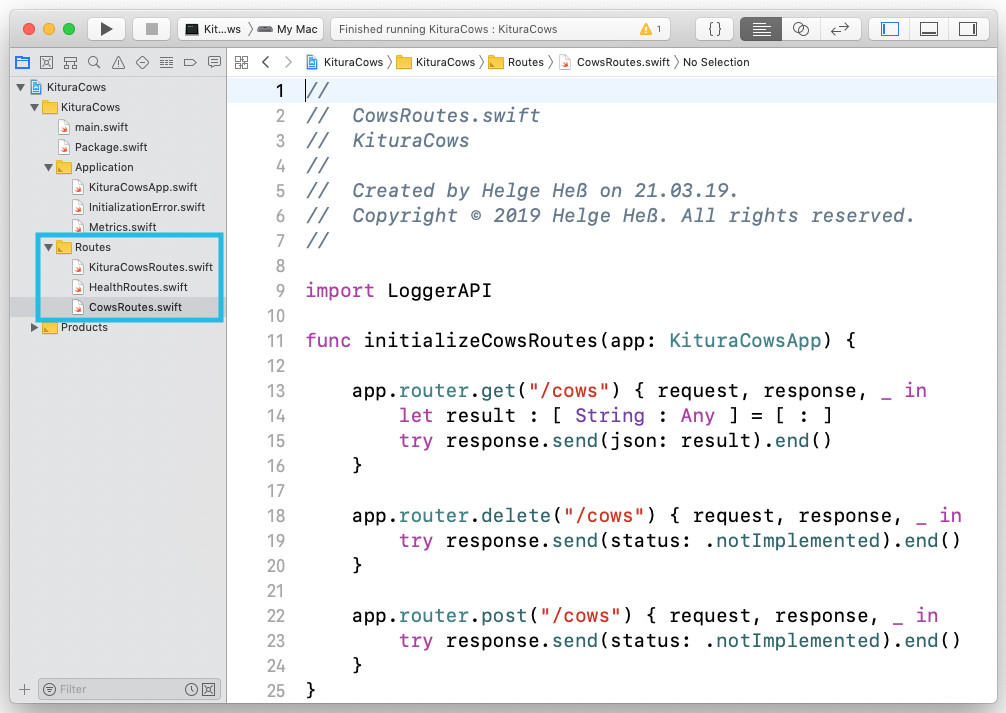
Which we are going to modify, so that it delivers 0xBEEF!
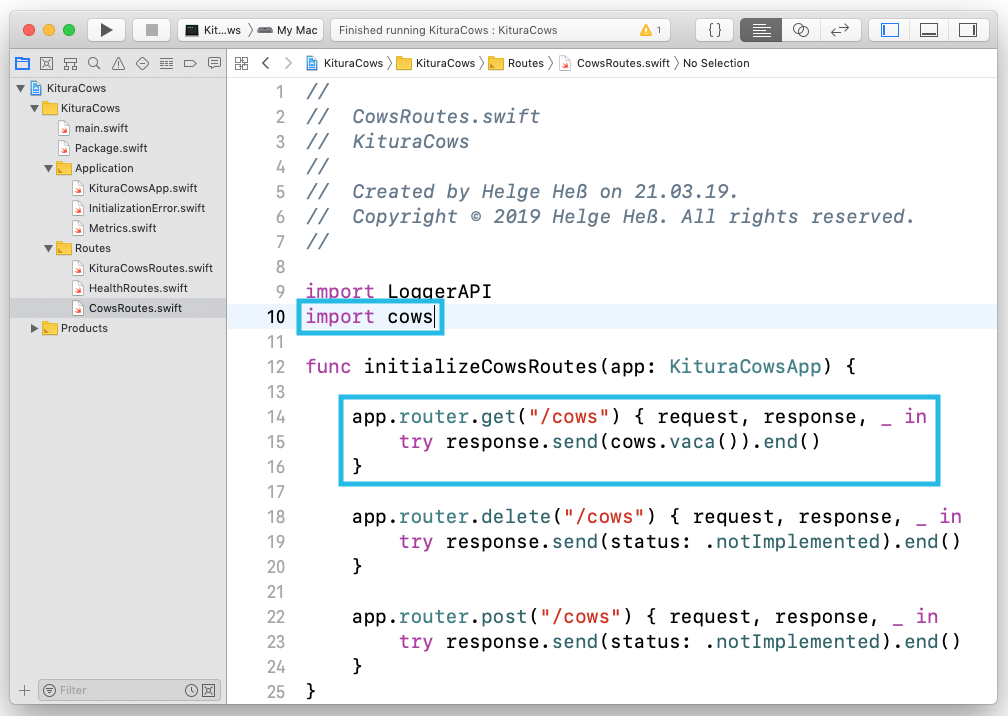
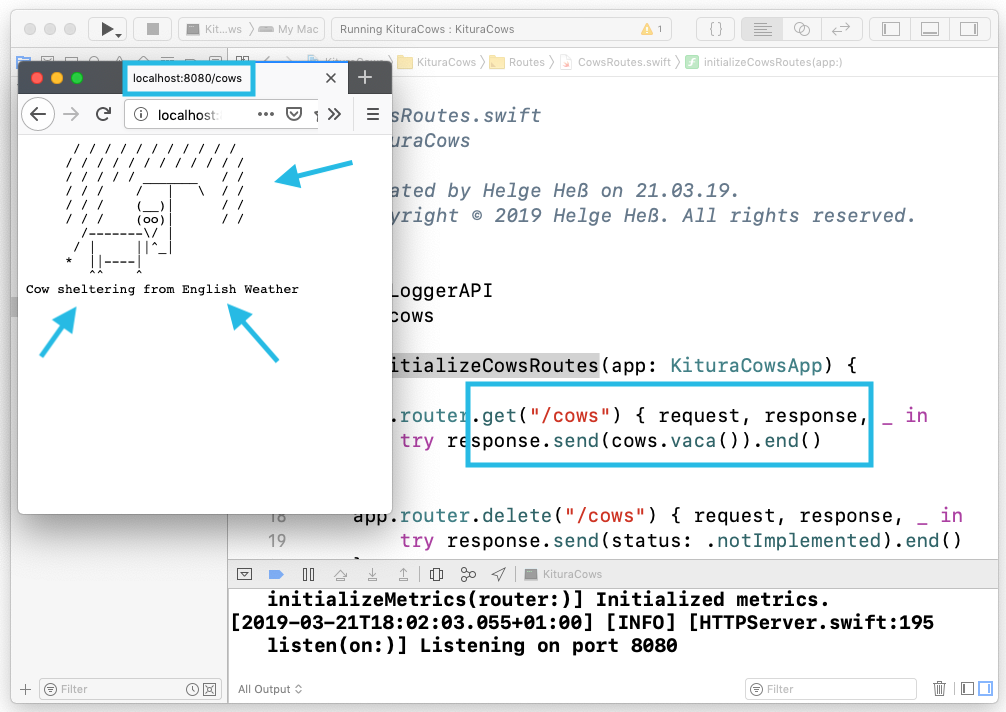
We need to import cows, and modify the GET route to return
the result of the cows.vaca() function - which returns a random ASCII
cow as a string:
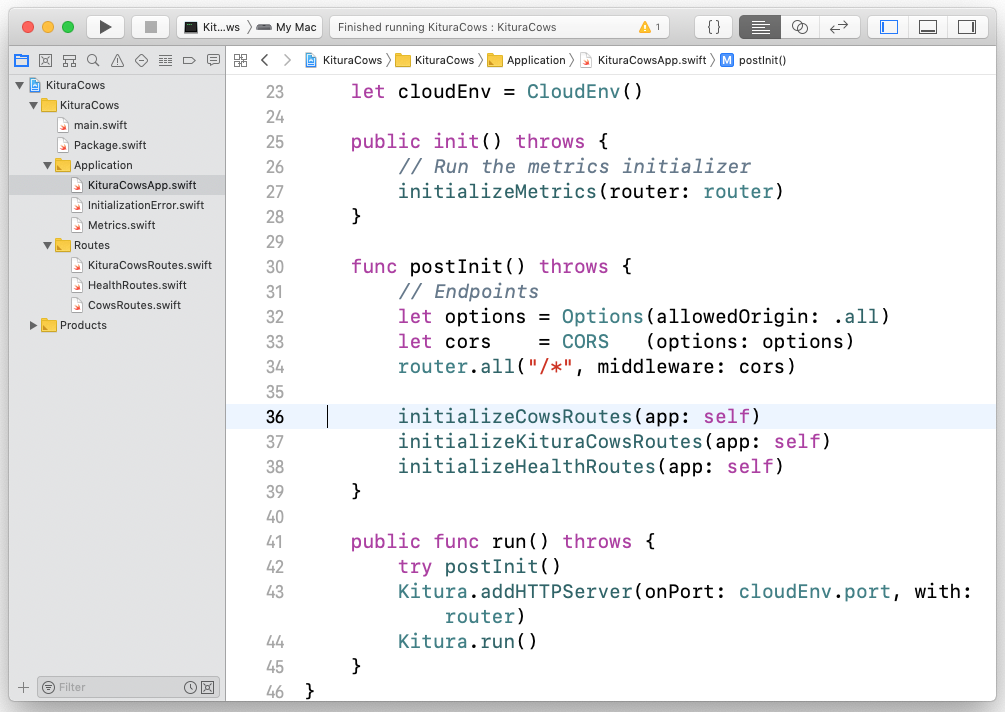
Finally we need to register those routes in the postInit function of
the Kitura application object:
Accessing the Cows
Just press the Xcode run button again. This time it has to do more
work. It has to fetch the
cows
package, as well as to reassemble the Kitura dependencies.
Again, this only happens once for each Package.swift change.
Hit http://localhost:8080/cows/ in your favorite browser (hope it’s not Mozilla):
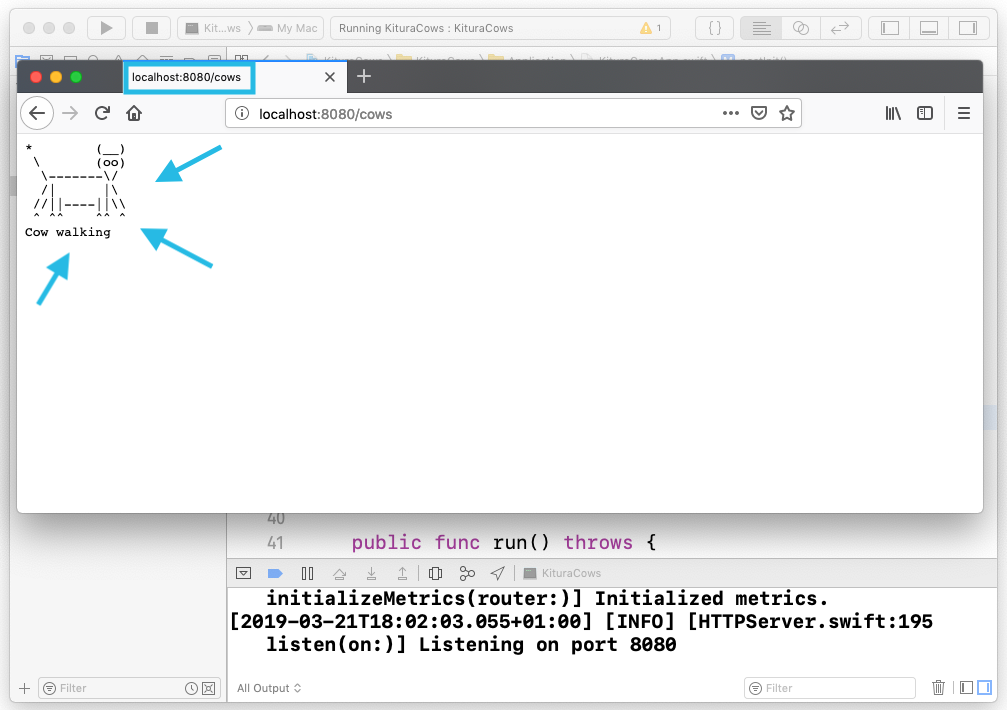
and you’ll get served. Hit reload to get another random cow:
Closing Notes
We hope you like SwiftXcode and what it does, and we welcome PRs improving the existing images, or adding new images!
Something doesn’t work for you? Contact us!
Links
- Kitura
- SwiftXcode
- Swift Package Manager
- MicroExpress package on GitHub (contains branches of all steps above!)
- SwiftNIO
- cows
- CodeCows (macOS)
- ASCII Cows (iOS)
- Other cool ARI projects:
- ExExpress
- Swift NIO IRC (an IRC server, web client, Eliza chatbot written in Swift NIO)
- Swift NIO Redis (a Redis in-memory database server, written in Swift NIO)
- SwiftObjects (WebObjects API in Swift, WebObjects intro)
- ZeeQL (an EOF/CoreData like framework for Swift)
- mod_swift (write Apache modules in Swift!)
- Noze.io (Node.js like, but typesafe, async-IO streams)
- Swiftmon/S
Contact
Hey, we love feedback!
Twitter, any of those:
@helje5,
@ar_institute.
Email: me@helgehess.eu.